# How to Build a React Application with Load More Functionality using React Hooks
In this article, we will build an application using class components and then later convert it to functional components using React Hooks in a step-by-step way.
By building this app, you will learn:
* How to make API calls
* How to implement load more functionality
* How to debug application issues
* How to use async/await
* How to update the component when something changes
* How to fix the infinite loop issue in the useEffect hook
* How to refactor class-based components into functional components with Hooks
and much more.
So let’s get started.
> Want to learn Redux from the absolute beginning and build a food ordering app from scratch? Check out the [Mastering Redux](https://master-redux.yogeshchavan.dev/) course.
## Initial Project Setup
Create a new project using `create-react-app`:
```js
npx create-react-app class-to-hooks-refactoring
```
Once the project is created, delete all files from the `src` folder and create the `index.js` file and the `styles.css` file inside the `src` folder. Also, create `components` folders inside the `src` folder.
Install the `axios` library by executing the following command from the project folder:
```js
yarn add axios@0.21.1
```
Open `styles.css` file and add the contents from [here](https://github.com/myogeshchavan97/class-to-hooks-refactoring/blob/master/src/styles.css) inside it.
## How to Create the Initial Pages
Create a new file `Header.js` inside the `components` folder with the following content:
```jsx
import React from "react";
const Header = () => {
return
Random Users
;
};
export default Header;
```
Create a new file `App.js` inside the `src` folder with the following content:
```jsx
import React from 'react';
import Header from './components/Header';
export default class App extends React.Component {
render() {
return (
App Component
);
}
}
```
Now, open `index.js` file and add the following contents into it:
```js
import React from 'react';
import ReactDOM from 'react-dom';
import App from './App';
import './styles.css';
ReactDOM.render(, document.getElementById('root'));
```
Now, start the application by running the `yarn start` command from the terminal.
You will see the following screen If you access the application at [http://localhost:3000/](http://localhost:3000/).

## How to Make an API Call
We will be using [Random Users](https://randomuser.me/) API to get a list of random users.
So open `App.js` file and add `componentDidMount` method inside the component:
```js
componentDidMount() {
axios
.get('https://randomuser.me/api/?page=0&results=10')
.then((response) => {
console.log(response.data);
})
.catch((error) => console.log('error', error));
}
```
Also, import `axios` at the top of the file:
```js
import axios from 'axios';
```
Your entire `App.js` file will look like this now:
```js
import React from 'react';
import Header from './components/Header';
import axios from 'axios';
export default class App extends React.Component {
componentDidMount() {
axios
.get('https://randomuser.me/api/?page=0&results=10')
.then((response) => {
console.log(response.data);
})
.catch((error) => console.log('error', error));
}
render() {
return (
App Component
);
}
}
```
Here, we're making an API call to get a list of 10 records initially to the URL `https://randomuser.me/api/?page=0&results=10`.
Now, If you check the application, you will see the response from the API in the console.

Now, let's declare a state to store the result and flags related to the loading and error message.
Replace the contents of `App.js` file with the following code:
```js
import React from 'react';
import Header from './components/Header';
import axios from 'axios';
export default class App extends React.Component {
state = {
users: [],
isLoading: false,
errorMsg: ''
};
componentDidMount() {
this.setState({ isLoading: true });
axios
.get('https://randomuser.me/api/?page=0&results=10')
.then((response) => {
this.setState({ users: response.data.results, errorMsg: '' });
})
.catch((error) =>
this.setState({
errorMsg: 'Error while loading data. Try again later.'
})
)
.finally(() => {
this.setState({ isLoading: false });
});
}
render() {
const { users, isLoading, errorMsg } = this.state;
console.log(users);
return (
{isLoading &&
Loading...
}
{errorMsg &&
{errorMsg}
}
);
}
}
```
Here, we've declared a state directly inside the class using [class properties syntax](https://javascript.plainenglish.io/how-to-write-clean-and-easy-to-understand-react-code-using-class-properties-syntax-5b375b0618d3?source=friends_link&sk=c170992cab9025fddb7b34b8894ea993) which is a common way to write state in class based components.
```js
state = {
users: [],
isLoading: false,
errorMsg: ''
};
```
Then inside the `componentDidMount` method, we're first setting the `isLoading` state to `true` before making the API call.
```js
this.setState({ isLoading: true });
```
Once we got the API response, we're storing the result in the `users` array which is declared in the state and setting the `errorMsg` state to empty so If there is any previous error, it will be cleared out.
```js
this.setState({ users: response.data.results, errorMsg: '' });
```
And in the `.catch` block, we're setting the `errorMsg` If there is any error while making an API call.
Then, we're using the `.finally` block to set the `isLoading` state to `false`.
```js
.finally(() => {
this.setState({ isLoading: false });
});
```
Using `finally` helps to avoid code duplication here because we don't need to set `isLoading` to `false` in `.then` and in `.catch` block again as `finally` block will always be executed even If there is success or error.
And in the render method, we're displaying either the error message or loading message along with the `users` array from the state in the console.
Now, If you check the application, you will see `users` information in the console on success or an error message on the UI for API failure.
## How to Display the Users Information
Now, let's display the `users` information on the screen.
Create a new file `User.js` inside the `components` folder with the following content:
```js
import React from "react";
const User = ({ name, location, email, picture }) => {
return (
Name: {name.first} {name.last}
Country: {location.country}
Email: {email}
);
};
export default User;
```
Now, create a new file `UsersList.js` inside the `components` folder with the following content:
```js
import React from 'react';
import User from './User';
const UsersList = ({ users }) => {
return (
{users && users.map((user) => )}
);
};
export default UsersList;
```
Now, open `App.js` file and replace the `render` method with the following code:
```js
render() {
const { users, isLoading, errorMsg } = this.state;
return (
{isLoading &&
Loading...
}
{errorMsg &&
{errorMsg}
}
);
}
```
Here, we're passing the `users` array as a prop to the `UsersList` component and inside the `UsersList` component, we're looping over the array and sending the user information to the `User` component by spreading out all the properties of the individual `user` as `{...props}` which finally displays the data on the screen.
Also, import the `UsersList` component at the top of the file:
```js
import UsersList from './components/UsersList';
```
If you check the application now, you will see the following screen:

As you can see, on every page refresh, a new set of random users are displayed on the screen.
## How to Add the Load More Functionality
Now, let's add load more functionality to load the next set of 10 users on every load more click.
Change the `render` method of the `App.js` file to the following code:
```js
render() {
const { users, isLoading, errorMsg } = this.state;
return (
{errorMsg &&
{errorMsg}
}
);
}
```
Here, we've added the `isLoading` check inside the button to display either `Loading...` or `Load More` text on the button.
Add a new `page` property to the state and initialize it to `0`.
```js
state = {
users: [],
page: 0,
isLoading: false,
errorMsg: ''
};
```
And add the `loadMore` handler function before the `render` method to increment the `page` state value by 1 on every button click.
```js
loadMore = () => {
this.setState((prevState) => ({
page: prevState.page + 1
}));
};
```
Here, we're using previous state to calculate the next state value of page so the above code is the same as below code:
```js
loadMore = () => {
this.setState((prevState) => {
return {
page: prevState.page + 1
};
});
};
```
We're just using ES6 shorthand syntax for returning an object from the function.
Now, Inside the `componentDidMount` method, change the API URL from the below code:
```js
'https://randomuser.me/api/?page=0&results=10'
```
to this code:
```js
`https://randomuser.me/api/?page=${page}&results=10`
```
Here, we're using the ES6 template literal syntax to use the dynamic value of the `page` state to load the next set of users on every button click.
Destructure the `page` from state inside the `componentDidMount` method like this:
```js
componentDidMount() {
const { page } = this.state;
....
}
```
> Want to explore all the ES6+ features in detail? Check out my [Mastering Modern JavaScript](https://modernjavascript.yogeshchavan.dev/) book.
Now, let's check the application functionality.

As you can see, when we click on the `Load More` button, the `page` state is changing in the react dev tools but we're not getting the new list of users displayed on the screen.
This is because even though we're changing the `page` state, we're not making API call again to get the next set of users with the changed `page` value. So let's fix this.
Create a new `loadUsers` function above the `loadMore` function and move all the code from `componentDidMount` to inside the `loadUsers` function and call the the `loadUsers` function from the `componentDidMount` method.
Also, add a `componentDidUpdate` method inside the `App` component like this:
```js
componentDidUpdate(prevProps, prevState) {
if (prevState.page !== this.state.page) {
this.loadUsers();
}
}
```
As we're updating the value of the `page` state in `loadMore` function once the state is updated, the `componentDidUpdate` method will be called so we're checking If the previous state value of `page` is not equal to the current state value and then make the API call again by calling the `loadUsers` function.
> Check out my [previous article](https://www.freecodecamp.org/news/what-is-state-in-react-explained-with-examples/) to learn more about why and when we need to use the `componentDidUpdate` method.
Your complete `App.js` file will look like this now:
```js
import React from 'react';
import Header from './components/Header';
import axios from 'axios';
import UsersList from './components/UsersList';
export default class App extends React.Component {
state = {
users: [],
page: 0,
isLoading: false,
errorMsg: ''
};
componentDidMount() {
this.loadUsers();
}
componentDidUpdate(prevProps, prevState) {
if (prevState.page !== this.state.page) {
this.loadUsers();
}
}
loadUsers = () => {
const { page } = this.state;
this.setState({ isLoading: true });
axios
.get(`https://randomuser.me/api/?page=${page}&results=10`)
.then((response) => {
this.setState({ users: response.data.results, errorMsg: '' });
})
.catch((error) =>
this.setState({
errorMsg: 'Error while loading data. Try again later.'
})
)
.finally(() => {
this.setState({ isLoading: false });
});
};
loadMore = () => {
this.setState((prevState) => ({
page: prevState.page + 1
}));
};
render() {
const { users, isLoading, errorMsg } = this.state;
return (
{errorMsg &&
{errorMsg}
}
);
}
}
```
Now, If you check the application again by running the `yarn start` command you will see the following screen:

As you can see, we're getting a new list of users displayed on every load more button click. But the issue is that we're able to see only 10 users at a time.
So let's make changes to add new users to the already displayed list of users.
For this, we need to make changes in the way we're setting the `users` state.
Our current `setState` call inside the `loadUsers` function looks like this:
```js
this.setState({ users: response.data.results, errorMsg: '' });
```
Here, we're always replacing the `users` array with the new set of users. So change the above `setState` call to the following code:
```js
this.setState((prevState) => ({
users: [...prevState.users, ...response.data.results],
errorMsg: ''
}));
```
Here, we're using updater syntax of `setState` where we're creating a new array by spreading out the already added `users` by using `...prevState.users` and then adding a new set of `users` by using `...response.data.results`.
So this way we'll not lose the previous loaded `users` data and also able to append a new set of `users`.
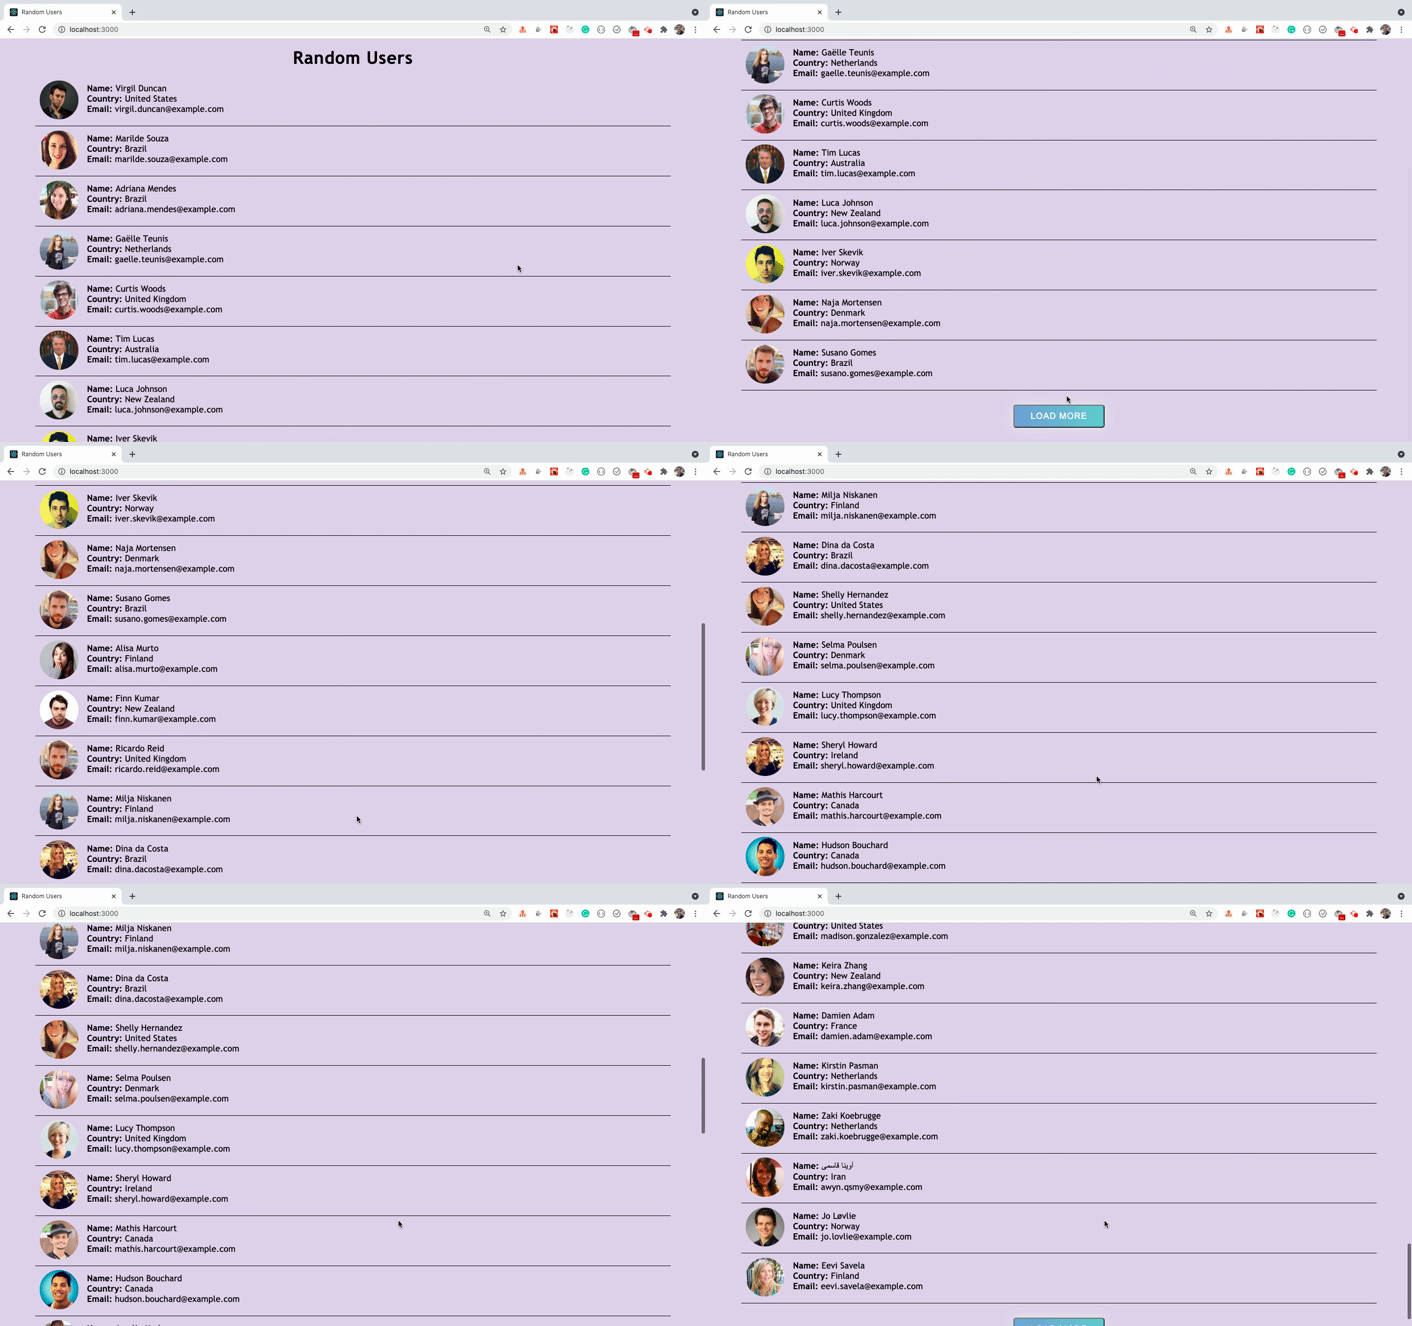
Now, If you check the application again, you will see the correct behavior of data loading.
## How to Improve the Code using Async/await
If you check the `loadUsers` function, you will see that the code looks complex and difficult to read at once.
```js
loadUsers = () => {
const { page } = this.state;
this.setState({ isLoading: true });
axios
.get(`https://randomuser.me/api/?page=${page}&results=10`)
.then((response) => {
this.setState((prevState) => ({
users: [...prevState.users, ...response.data.results],
errorMsg: ''
}));
})
.catch((error) =>
this.setState({
errorMsg: 'Error while loading data. Try again later.'
})
)
.finally(() => {
this.setState({ isLoading: false });
});
};
```
We can fix this using async/await syntax.
First, we need to mark the `loadUsers` function as async:
```js
loadUsers = async () => {
```
Because we can use the `await` keyword only inside the function which is declared as `async`.
Now, replace the `loadUsers` function with the following code:
```js
loadUsers = async () => {
try {
const { page } = this.state;
this.setState({ isLoading: true });
const response = await axios.get(
`https://randomuser.me/api/?page=${page}&results=10`
);
this.setState((prevState) => ({
users: [...prevState.users, ...response.data.results],
errorMsg: ''
}));
} catch (error) {
this.setState({
errorMsg: 'Error while loading data. Try again later.'
});
} finally {
this.setState({ isLoading: false });
}
};
```
Here, we've used the `await` keyword before the `axios.get` call so the next line of code which is the `setState` call will not be executed until we get the response from the API.
If there is any error while getting the response from API, the `catch` block will be executed and `finally` block will set the `isLoading` state to `false`.
Your changed `App.js` file will look like this now:
```js
import React from 'react';
import Header from './components/Header';
import axios from 'axios';
import UsersList from './components/UsersList';
export default class App extends React.Component {
state = {
users: [],
page: 0,
isLoading: false,
errorMsg: ''
};
componentDidMount() {
this.loadUsers();
}
componentDidUpdate(prevProps, prevState) {
if (prevState.page !== this.state.page) {
this.loadUsers();
}
}
loadUsers = async () => {
try {
const { page } = this.state;
this.setState({ isLoading: true });
const response = await axios.get(
`https://randomuser.me/api/?page=${page}&results=10`
);
this.setState((prevState) => ({
users: [...prevState.users, ...response.data.results],
errorMsg: ''
}));
} catch (error) {
this.setState({
errorMsg: 'Error while loading data. Try again later.'
});
} finally {
this.setState({ isLoading: false });
}
};
loadMore = () => {
this.setState((prevState) => ({
page: prevState.page + 1
}));
};
render() {
const { users, isLoading, errorMsg } = this.state;
return (
{errorMsg &&
{errorMsg}
}
);
}
}
```
Now, the `loadUsers` function code looks much cleaner and easy to understand than the previous one and If you check the application, you will see that the application is also working correctly.

## How to Refactor Class Component Code to Functional Component Code
Now, we're done with the complete functionality of the app, let's refactor the code to Functional components with Hooks.
> If you're new to React Hooks, check out my [this article](https://levelup.gitconnected.com/an-introduction-to-react-hooks-50281fd961fe?source=friends_link&sk=89baff89ec8bc637e7c13b7554904e54) for an introduction to React Hooks.
Create a new file `AppFunctional.js` inside the `src` folder with the following content:
```js
import React from 'react';
const AppFunctional = () => {
return (
Functional Component
);
};
export default AppFunctional;
```
We've created a new file for the functional component so you will be able to compare both the code and keep it for your reference.
Now, open `index.js` file and replace the contents of the file with the following code:
```js
import React from 'react';
import ReactDOM from 'react-dom';
import AppFunctional from './AppFunctional';
import './styles.css';
ReactDOM.render(, document.getElementById('root'));
```
Here, we've used the `AppFunctional` component inside the `render` method and also added the import for the same at the top of the file.
Now, If you restart your application using the `yarn start` command you will see the following screen:

So we're correctly displaying the `AppFunctional` component code on the screen.
Now, replace the contents of the`AppFunctional` component with the following code:
```js
import React, { useState, useEffect } from 'react';
import axios from 'axios';
import Header from './components/Header';
import UsersList from './components/UsersList';
const AppFunctional = () => {
const [users, setUsers] = useState([]);
const [page, setPage] = useState(0);
const [isLoading, setIsLoading] = useState(false);
const [errorMsg, setErrorMsg] = useState('');
useEffect(() => {
const loadUsers = async () => {
try {
setIsLoading(true);
const response = await axios.get(
`https://randomuser.me/api/?page=${page}&results=10`
);
setUsers([...users, ...response.data.results]);
setErrorMsg('');
} catch (error) {
setErrorMsg('Error while loading data. Try again later.');
} finally {
setIsLoading(false);
}
};
loadUsers();
}, []);
const loadMore = () => {
setPage((page) => page + 1);
};
return (
{errorMsg &&
{errorMsg}
}
);
};
export default AppFunctional;
```
Here, we've initially declared the required states using the `useState` hook:
```js
const [users, setUsers] = useState([]);
const [page, setPage] = useState(0);
const [isLoading, setIsLoading] = useState(false);
const [errorMsg, setErrorMsg] = useState('');
```
Then we've added a `useEffect` hook and passed an empty array `[]` as the second argument to it so the code inside the `useEffect` hook will be executed only once when the component is mounted.
```js
useEffect(() => {
// your code
}, []);
```
We've moved the entire `loadUsers` function inside the `useEffect` hook and then called it inside the hook like this:
```js
useEffect(() => {
const loadUsers = async () => {
// your code
};
loadUsers();
}, []);
```
We've also removed all the references to `this.state` as functional components don't need `this` context.
Before making the API call, we're setting the `isLoading` state to `true` using `setIsLoading(true);`.
As we already have access to the `users` array inside the component, we're directly setting as new array for the `setUsers` function like this:
```js
setUsers([...users, ...response.data.results]);
```
> If you want to know why we can't use the `async` keyword directly for the `useEffect` hook function, check out my [this article](https://javascript.plainenglish.io/handling-api-calls-using-async-await-in-useeffect-hook-990fb4ae423?source=friends_link&sk=dd686f066a434c41a76c352e3ec69767).
Then we've changed the `loadMore` function from the below code:
```js
loadMore = () => {
this.setState((prevState) => ({
page: prevState.page + 1
}));
};
```
to this code:
```js
const loadMore = () => {
setPage((page) => page + 1);
};
```
> Note that, to declare a function in functional components you need to add `const` or `let` before the declaration. As the function is not going to change, it's recommended to use `const` such as `const loadMore = () => { }`.
Then we've copied the `render` method content as it is inside the `AppFunctional` component for returning the JSX and changed `onClick={this.loadMore}` to `onClick={loadMore}`.
```js
return (
{errorMsg &&
{errorMsg}
}
);
```
Now, If you check the application, you will see the following screen:

As you can see, the users are correctly getting loaded but the load more functionality does not work.
This is because we're only making the API call once when the component is mounted as we're passing the empty dependency array `[]` as the second argument to the `useEffect` hook.
To make the API call again when the `page` state changes, we need to add the `page` as a dependency for the `useEffect` hook like this:
```js
useEffect(() => {
// execute the code to load users
}, [page]);
```
The above `useEffect` is the same as writing the below code:
```js
componentDidUpdate(prevProps, prevState) {
if (prevState.page !== this.state.page) {
// execute the code to load users
}
}
```
The `useEffect` makes it really easy to write less code that is easy to understand.
So now with this change, the code inside the `useEffect` hook will be executed when the component mounts as well as when the `page` state is changed.
Now, If you check the application, you will see that the load more functionality is working again as expected.

But If you check the terminal/command prompt, you might see a warning as shown below (If you've `ESLint` installed on your machine):

The warnings help us to avoid issues in our application that might occur later so it's always good to fix those warnings If possible.
As we're referencing the `users` state inside the `loadUsers` function, we need to include that also in the dependency array. So let's do that.
Include the `users` as dependency along with the `page` like this:
```js
useEffect(() => {
// your code
}, [page, users]);
```
Let's check the application functionality now.

As you can see, we're continuously getting a new set of users as we scroll the page and the application is going in an infinite loop.
This is because, when the component is mounted, the code inside the `useEffect` hook will be executed to make an API call and once we get the result, we're setting the `users` array and as `users` is mentioned in the dependencies list, once the `users` array is changed, the `useEffect` will run again and it will happen again and again creating an infinite loop.
So to fix this, we need to avoid referencing the external `users` array somehow. So let's use the updater syntax of set state to set the `users` state.
Therefore, change the below code:
```js
setUsers([...users, ...response.data.results]);
```
to this code:
```js
setUsers((users) => [...users, ...response.data.results]);
```
Here, we're using the previous value of users to create a new `users` array.
Now, we can remove the `users` from the `useEffect` dependencies array as we're not referencing the external `users` variable.
Your changed `useEffect` hook will look like this now:
```js
useEffect(() => {
const loadUsers = async () => {
try {
setIsLoading(true);
const response = await axios.get(
`https://randomuser.me/api/?page=${page}&results=10`
);
setUsers((users) => [...users, ...response.data.results]);
setErrorMsg('');
} catch (error) {
setErrorMsg('Error while loading data. Try again later.');
} finally {
setIsLoading(false);
}
};
loadUsers();
}, [page]);
```
If you check the application now, you will see that the application is working as expected without any issue.

and we're also not getting any error in the terminal now.

### Thanks for reading!
You can find the complete source code for this application in [this repository](https://github.com/myogeshchavan97/class-to-hooks-refactoring) and a live demo of the deployed application [here](https://random-users-app.netlify.app/).
Starting with ES6, there are many useful additions to JavaScript like:
* ES6 Destructuring
* Import and Export Syntax
* Arrow functions
* Promises
* Async/await
* Optional chaining operator
and a lot more.
**You can learn everything about all the ES6+ features in detail in my [Mastering Modern JavaScript](https://modernjavascript.yogeshchavan.dev/) book.**
> Check out free preview contents of the book [here](https://www.freecodecamp.org/news/learn-modern-javascript/).
Also, you can check out my **free** [Introduction to React Router](https://yogeshchavan1.podia.com/react-router-introduction) course to learn React Router from scratch.
Want to stay up to date with regular content regarding JavaScript, React, Node.js? [Follow me on LinkedIn](https://www.linkedin.com/in/yogesh-chavan97/).
[](https://bit.ly/3w0DGum)
[](https://www.buymeacoffee.com/myogeshchavan97)
 ](https://bit.ly/3w0DGum)
[
](https://bit.ly/3w0DGum)
[ ](https://www.buymeacoffee.com/myogeshchavan97)