How to Configure ESLint For Your Project From Scratch

Full Stack Developer | Freelancer | JavaScript | React | Nodejs.
Loves sharing knowledge through technical articles.
Dev.to: https://dev.to/myogeshchavan97
https://linktr.ee/myogeshchavan97
ESLint is a linter that helps to improve the code quality and fix bugs beforehand to avoid them from coming at runtime. It also helps to avoid hard to debug issues in the future.
Knowing how to use ESLint is very important as most companies are actively using it.
There are also other linters available like jslint, jshint but ESLint is the most widely used and popular.
In this article, we will explore what is ESLint is and how to use it.
Let's get started.
ESLint displays warning or error messages when
- We use a variable without declaring it
- We re-declare the variable
- We try to change the constant value
- We add unnecessary parenthesis
- When we use the wrong syntax
ESLint also provides suggestions based on preferred code style and wrong syntaxes.
Note that ESLint just displays warnings or errors so you can fix them but it does not stop the program from running.
ESLint website is really nice and well documented which describes each part in detail with various rules and information related to that.
Installation:
Create a new folder with the name eslint-setup and from inside this folder execute the following command in terminal:
npm init -y

OR

yarn init -y
This will create a package.json file.
Now, Install the eslint package as dev dependency as it's only used for development and not in production.
npm install eslint --save-dev

OR

yarn add eslint --dev
This will add eslint entry into the devDependencies section of the package.json file.
Basic Configuration
Create a new file index.js in your eslint-setup folder and add the following variable declaration inside it and save it:
var name;
You will see that, there is no error shown. This is because we need to do two things.
- Install the eslint VS Code extension
- Create .eslintrc file
So let's do that.
Install the ESLint VS Code Extension as shown below:
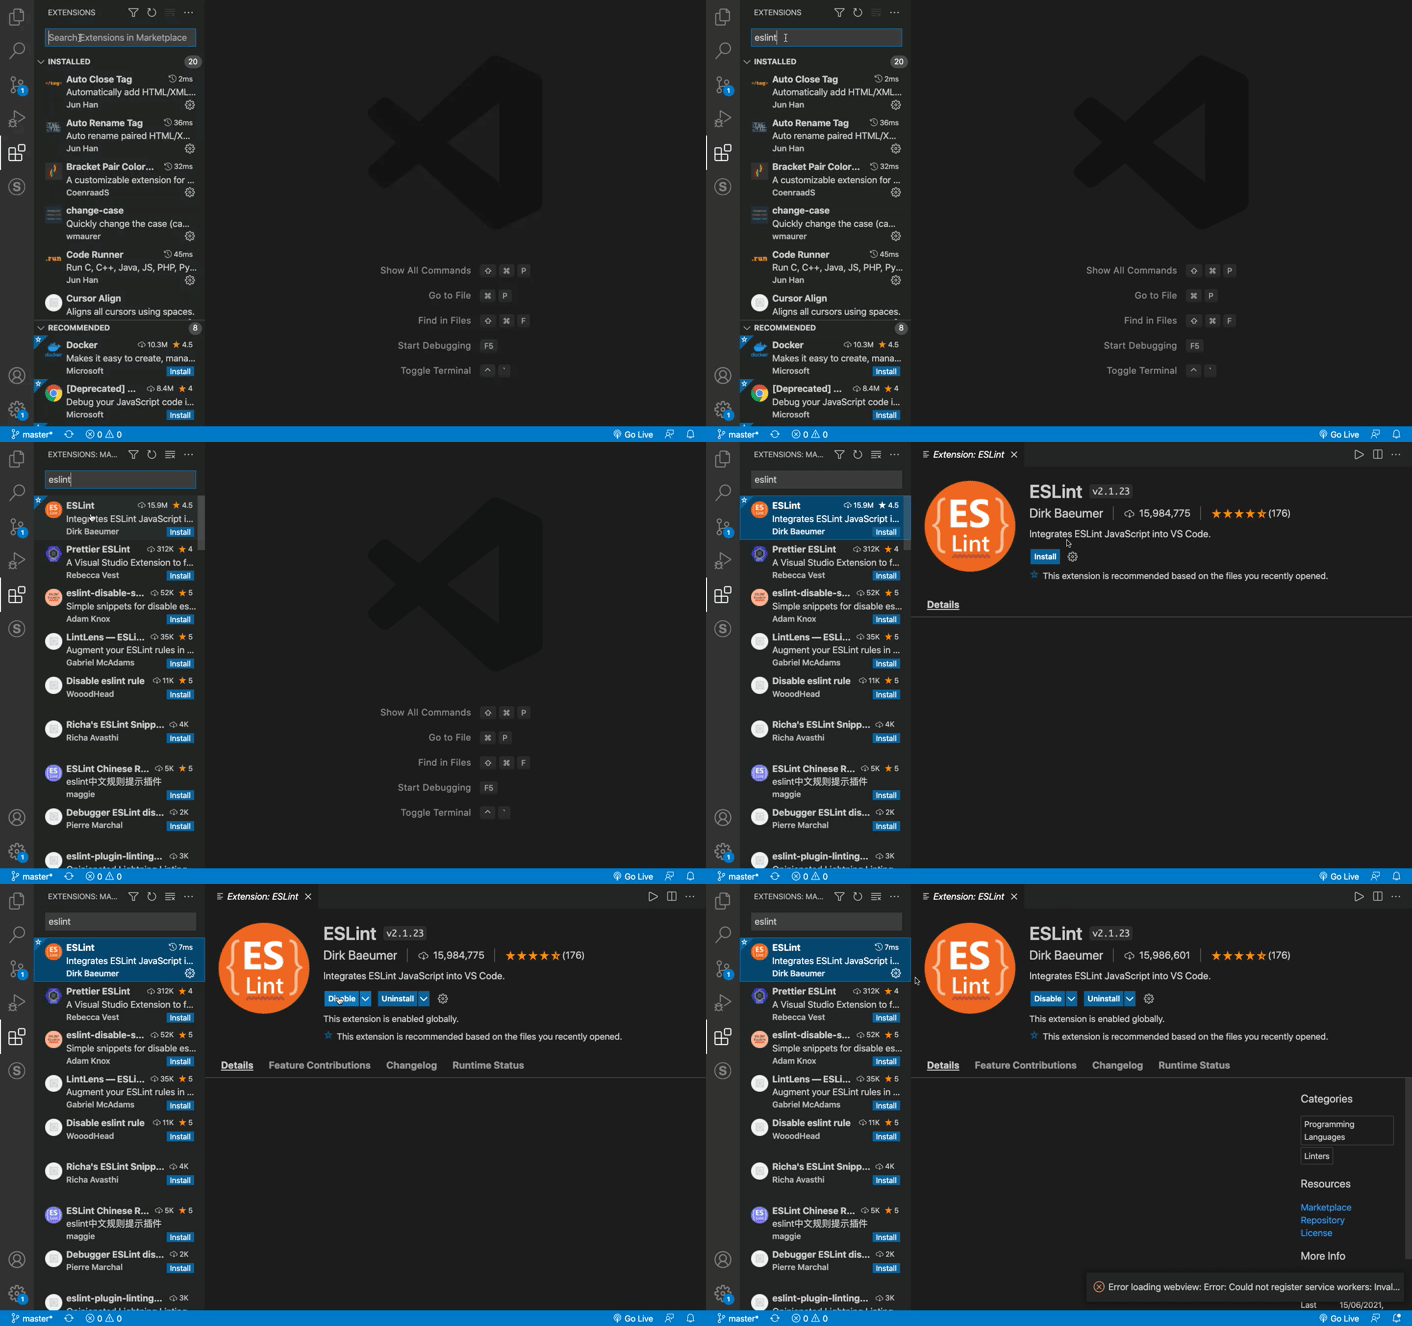
Now Create a new file .eslintrc( doteslintrc) with the following code:
{
 "extends": "eslint:recommended"
}
This will add support for basic recommended ESLint rules. Save the file and if you open index.js, you will see a red underline for the variable with the message.
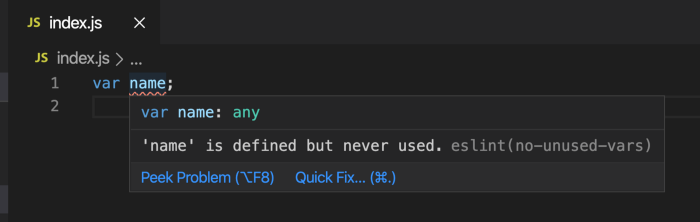
So the ESLint will make sure that you are not creating unnecessary variables which will never be used.
The name in brackets in the error message (no-unused-vars) is the name of the rule which we can configure in the .eslintrc file to either show or hide the message.
If you don't want to see that red underline, you can disable it in your .eslintrc file by adding it as a rule:
{
  "extends": "eslint:recommended",
  "rules": {
    "no-unused-vars": "off"
  }
}
With this change, it will not show the red underline but generally, you should not disable the no-unused-vars rule as it helps to avoid creating unused variables.
If you want to disable some rule only for a particular line and don't want to disable it in the .eslintrc file, then just add the following line before the line for which you want to disable the rule:
// eslint-disable-next-line max-len
<div className={`${isVisible ? 'show suggestion-box' : 'suggestion-box'}`}>
The above line will disable the maximum length eslint error so you'll not see an error for that line if the maximum allocated length for the line exceeds.
Now, let's use some ES6 features in our index.js file:
Open index.js file and add following code inside it:
const user = 'Harry';
console.log(user);
Now, you will see a red underline for the const keyword.
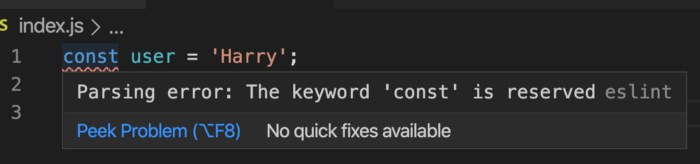
This is because by default ESLint runs code in an ES5 environment.
To specify ES6 and specify that the code can be run in a browser or node environment, we can add that as another property in the .eslintrc file:
{
  "extends": "eslint:recommended",
  "parserOptions": {
    "ecmaVersion": 6
  },
  "env": {
    "node": true,
    "browser": true,
    "es6": true
  }
}
Here, in parserOptions, we specify which ecmaVersion to use.
If you hover over the number 6, you can see additional information about all available versions to use.
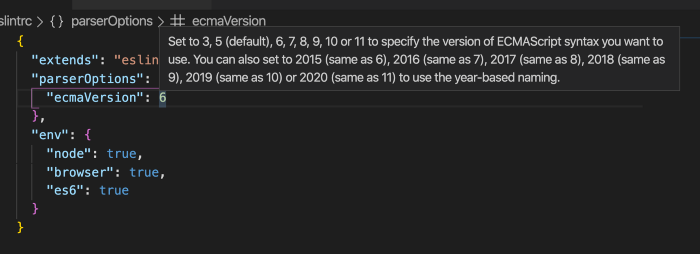
You can change the value as per your need.
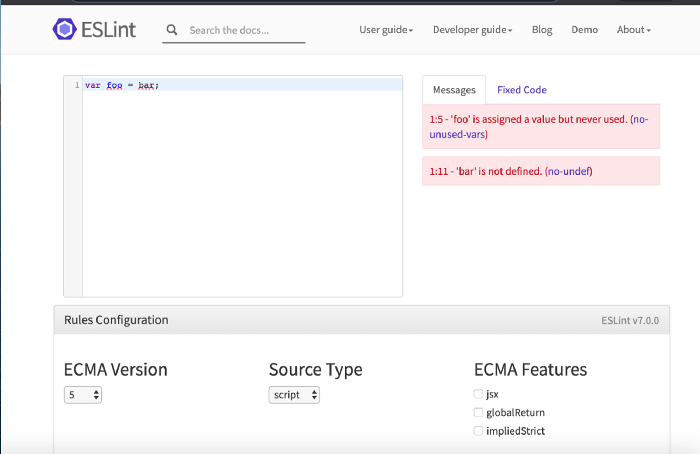
You can see all available environments HERE.
Navigate to this URL and click on the Rules Configuration button and you can check and uncheck the environments and verify the code by typing in the textarea.
Linting as per Airbnb Style guide:
Using "extends": "eslint:recommended" inside .eslintrc file is fine but it does not cover all styles guidelines. There are more usable and widely used guidelines in all projects provided by Airbnb which you can access HERE.
These guidelines, help us to
- Avoid creating objects using a new operator when required.
- Also displays a warning when we use let instead of const if the variable is not going to change.
- Helps to add and avoid extra spacing when using operators or functions. and much much more.
Airbnb provides JavaScript and React linting support.
To use linting for just JavaScript without React, you can install the following dependencies:
npm install eslint-config-airbnb-base@latest eslint-plugin-import --save-dev

OR

yarn add eslint-config-airbnb-base@latest eslint-plugin-import --dev
You can find more information about it HERE.
To setup linting for JavaScript with React, install the following dependencies:
npm install eslint-config-airbnb@latest eslint-plugin-import eslint-plugin-react eslint-plugin-react-hooks eslint-plugin-jsx-a11y --save-dev

OR

yarn add eslint-config-airbnb@latest eslint-plugin-import eslint-plugin-react eslint-plugin-react-hooks eslint-plugin-jsx-a11y --dev
You can find more information about it HERE.
and in the .eslintrc file, change
"extends": "eslint:recommended",
to
"extends": "airbnb",
Now, let's write some React code and we can check the linting.
Now, open the index.js file and add the following code inside it:
import React from 'react';
import ReactDOM from 'react-dom';

const App = () => <h1>This is some JSX</h1>;

ReactDOM.render(<App />, document.getElementById('root'));
If you save the file, you will see many red underlines saying:
- unable to find packages react, react-dom
- 'App' is never reassigned. Use 'const' instead
- JSX not allowed in files with extension 'js'
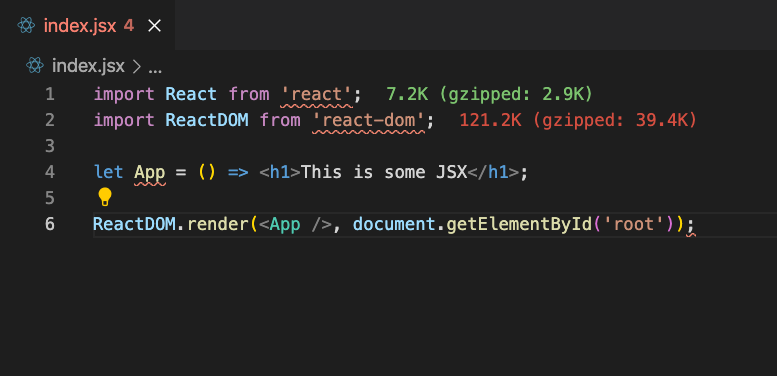
To fix the first error, install the react and react-dom packages:
npm install react react-dom

OR

yarn add react react-dom
Now, for the second error is we need to change let to const as it's never changed.
So it’s always recommended to use const when its value is not going to change.
As you can see, linting gives helpful suggestions to write better code.
If you want to learn more information about what any error means, you can just copy the rule name displayed in brackets when you mouse hover over the red underline and search in google. Like prefer-const eslint and it will show you all the information about how to fix and what issues it causes.
To find more information about any rule and how to disable it, you can search for that rule on the rules page HERE.
If you mouse over the JSX red underline on line number 6, you can see its rule name "react/jsx-filename-extension".
If you can't find the rule on the rules page HERE, you can search for it in google as react/jsx-filename-extension eslint and you will see the result showing how to fix it as shown HERE.
So to disable this check, we can add a rule in the .eslintrc file:
"rules": {
    "react/jsx-filename-extension": "off"
}
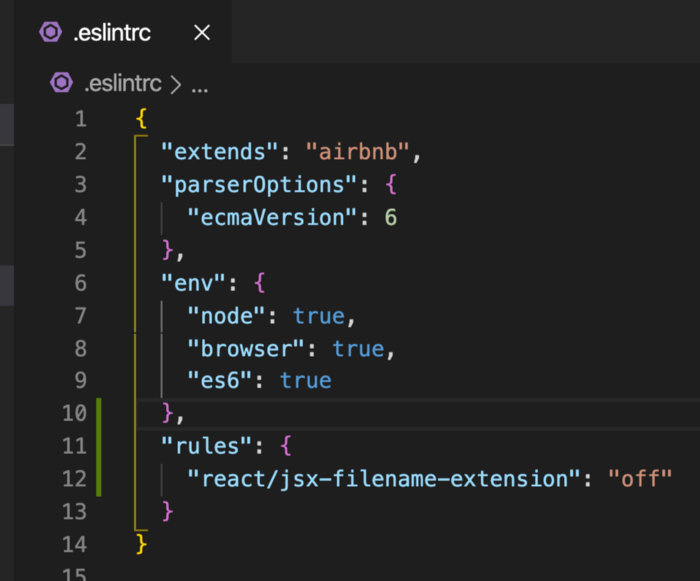
The value is generally one of the following:
- warn: to show as a warning
- error: to show as an error
- off: to not show the red underline
You may find sometimes, error code is used in the documentation, instead of the text warn, error or off.
0 is for off, 1 is for warn and 2 is for error.
Now, if you save the .eslintrc file, you will see that, there are no more red underlines in the index.js file.
That's it about this article. Hope you learned something new.
Thanks for reading!
You can find Complete Github Source Code for this article with the additional configuration in .eslintrc for better linting HERE.
Check out my recently published Mastering Redux course.
In this course, you will build 3 apps along with food ordering app and you'll learn:
- Basic and advanced Redux
- How to manage the complex state of array and objects
- How to use multiple reducers to manage complex redux state
- How to debug Redux application
- How to use Redux in React using react-redux library to make your app reactive.
- How to use redux-thunk library to handle async API calls and much more
and then finally we'll build a complete food ordering app from scratch with stripe integration for accepting payments and deploy it to the production.

Want to stay up to date with regular content regarding JavaScript, React, Node.js? Follow me on LinkedIn.