How to Create and Publish npm Package

Full Stack Developer | Freelancer | JavaScript | React | Nodejs.
Loves sharing knowledge through technical articles.
Dev.to: https://dev.to/myogeshchavan97
https://linktr.ee/myogeshchavan97
Introduction
In this tutorial, you will create your own npm package and publish it to the npm repository.
By doing this, you will understand:
- How to create an npm package
- How to install it locally before publishing to test its functionality
- How to install and use the published package using ES6 import syntax or using Node.js require statement
- How to manage semantic versioning of the package
- How to update the package with the new version and publish it again
To be specific, you will build a package that will return a list of GitHub repositories of the specified username sorted by the number of stars for each repository.
Prerequisites
You will need the following to complete this tutorial:
- A valid installation of Git version control
- Node.js installed locally, which you can do by following the instructions given on this page.
Step 1 — Initial Setup
Create a new folder with the name github-repos-search and initialize a package.json file:
mkdir github-repos-search
cd github-repos-search
npm init -y
Initialize the current project as a git repository by running the following command from the github-repos-search folder:
git init .
Create a .gitignore file to exclude the node_modules folder. Add the following contents inside .gitignore file:
node_modules
Install the axios package that you will use to make a call to the GitHub API.
npm install axios
Your package.json file will look like this now:
{
  "name": "github-repos-search",
  "version": "1.0.0",
  "description": "",
  "main": "index.js",
  "dependencies": {
    "axios": "^0.20.0"
  },
  "devDependencies": {},
  "scripts": {
    "test": "echo \"Error: no test specified\" && exit 1"
  },
  "keywords": [],
  "author": "",
  "license": "ISC"
}
Inside the package.json file, the value for the name is
github-repos-search. So our package name after publishing to npm repository will becomegithub-repos-search. Also, the name has to be unique on the npm repository so first check if such npm repository already exists or not by navigating to https://www.npmjs.com/package/your_repository_name_from_package_json. Otherwise, you will get an error while publishing the package to the npm repository if the name already exists.
Step 2 — Writing the code
Create a new file with the name index.js and add the following contents inside it:
const axios = require('axios');
const getRepos = async ({
  username = 'myogeshchavan97',
  page = 1,
  per_page = 30
} = {}) => {
  try {
    const repos = await axios.get(
      `https://api.github.com/users/${username}/repos?page=${page}&per_page=${per_page}&sort=updated`
    );
    return repos.data
      .map((repo) => {
        return {
          name: repo.name,
          url: repo.html_url,
          description: repo.description,
          stars: repo.stargazers_count
        };
      })
      .sort((first, second) => second.stars - first.stars);
  } catch (error) {
    return [];
  }
};

getRepos().then((repositories) => console.log(repositories));
Let’s understand the code first.
You have created a
getReposfunction that accepts an optional object withusername,pageandper_pageproperties.Then you used object destructuring syntax for getting those properties out of the object.
Passing an object to the function is optional so we have initialized it to default values if the object is not passed to the function like this:
{
  username = 'myogeshchavan97',
  page = 1,
  per_page = 30
} = {}
The reason for assigning an empty object
{}is to not get an error while destructuring username from the object if the object is not passed.Then inside the function, you are making a call to the GitHub API by passing the required parameters to get the repositories of the specified user sorted by the updated date.
const repos = await axios.get(
      `https://api.github.com/users/${username}/repos?page=${page}&per_page=${per_page}&sort=updated`
    );
Here, we are using async/await syntax so the
getReposfunction is declared as async.Then you are selecting only the required fields from the response using the Array map method
repos.data.map((repo) => {
    return {
      name: repo.name,
      url: repo.html_url,
      description: repo.description,
      stars: repo.stargazers_count
    };
  })
- Then that result is sorted by descending order of stars so the first element in the list will be with the highest stars
.sort((first, second) => second.stars - first.stars);
- If there is any error, you are returning an empty array in the catch block.
- As the
getReposfunction is declared asasync, you will get back a promise so you are using the.thenhandler to get the result of thegetReposfunction call and printing to the console.
getRepos().then((repositories) => console.log(repositories));
Step 3 — Executing the code
Now, run the index.js file by executing the following command from the command line:
node index.js
You will see the list of the first 30 repositories:
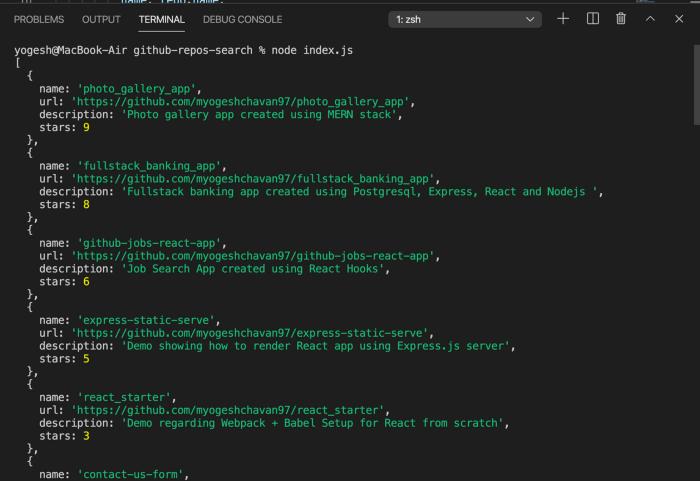
In the file, you have not provided the username so by default my repositories are displayed.
Let’s change that to the following code:
getRepos({
  username: 'gaearon'
}).then((repositories) => console.log(repositories));
Run the file again by executing the node index.js command and you will see the following output:
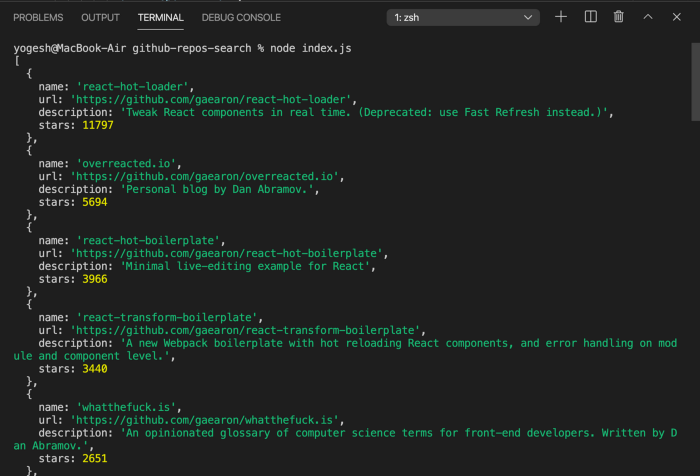
You can choose to pass the page and per_page properties to change the response to get the first 50 repositories.
getRepos({
  username: 'gaearon',
  page: 1,
  per_page: 50
}).then((repositories) => console.log(repositories));
Now, you know that the functionality is working. Let’s export this module so you can call this getRepos method from any other file.
So remove the below code from the file:
getRepos({
  username: 'gaearon',
  page: 1,
  per_page: 50
}).then((repositories) => console.log(repositories));
and add the below line instead
module.exports = { getRepos };
Here, you are exporting the getRepos function as a property of the object so later if you want to export any other function you can easily add it to the object.
So the above line is the same as the below line:
module.exports = { getRepos: getRepos };
Step 4 — Testing the created npm package using require statement
Now, you are done with creating the npm package but before publishing it to the npm repository, you need to make sure it works when you use it using require or import statement.
There is an easy way to check that. Execute the following command from the command line from inside the github-repos-search folder:
npm link
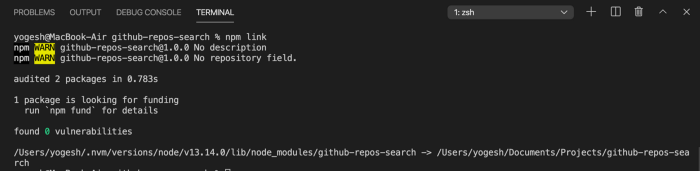
Executing the npm link command creates a symbolic link for your current package inside the global npm node_modules folder (The same folder where our global npm dependencies get installed).
So now you can use your created npm package inside any project.
Now, create a new folder on your desktop with any name for example test-repos-library-node and initialize a package.json file so you can confirm that the package is installed correctly:
cd ~/Desktop
mkdir test-repos-library-node
cd test-repos-library-node
npm init -y
If you remember, the name property in our package's package.json file was github-repos-search so you need to require the package using the same name.
Now, execute the following command from inside the test-repos-library-node folder to use the package you created:
npm link github-repos-search

Create a new file with the name index.js and add the following code inside it:
const { getRepos } = require('github-repos-search');

getRepos().then((repositories) => console.log(repositories));
Here, you have imported the package directly from the node_modules folder(This was only possible because you linked it using the npm link).
Now, run the file by executing it from the command line:
node index.js
You will see the correct output displayed:
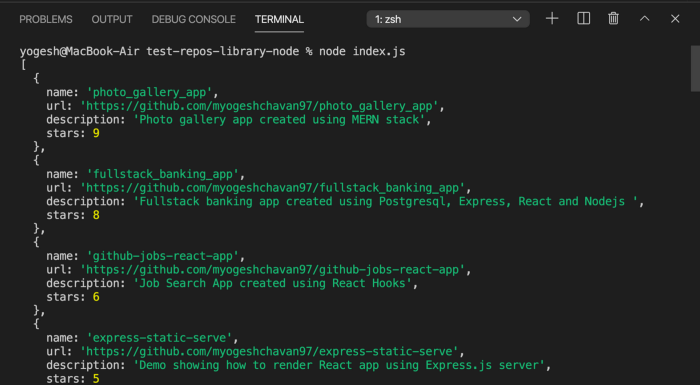
This proves that when you publish the npm package on the npm repository, anyone can use it by installing it and using the require statement.
Step 5 — Testing the created npm package using the import statement
You have verified that the package works by using the require statement. Let's verify it by using the ES6 import statement.
Create a new React project by executing the following command from your desktop folder:
cd ~/Desktop
npx create-react-app test-repos-library-react
Now, execute the following command from inside the test-repos-library-react folder to use the package you created:
npm link github-repos-search
Now, open the src/App.js file and replace it with the following content:
import { getRepos } from 'github-repos-search';
import React, { useEffect } from 'react';

function App() {

 useEffect(() => {
     getRepos().then((repositories) => console.log(repositories));
 }, []);

  return (
    <div className="App">
      <h2>Open browser console to see the output.</h2>
    </div>
  );
}

export default App;
Start the React app by executing the following command from the terminal:
yarn start
Now, If you check the browser console, you will see the output as expected:
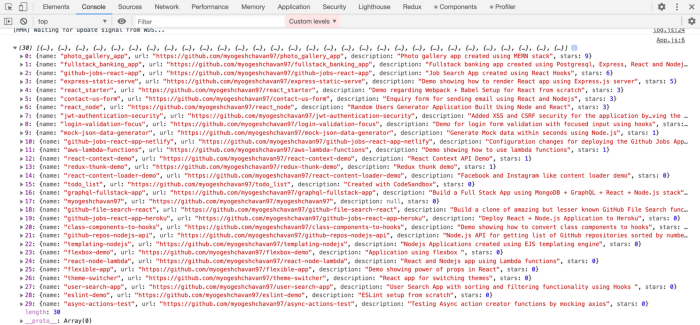
This proves that when you publish the npm package on the npm repository, anyone can use it by installing it and using the import statement.
Step 6 — Publish to the npm repository
Now, you have verified that the package is working fine.
It’s time to publish it to the npm repository.
Switch back to the github-repos-search project folder where you have created the npm package.
Let’s add some metadata in the package.json file to display some more information about the package
Here is the final package.json file:
{
  "name": "github-repos-search",
  "version": "1.0.0",
  "description": "",
  "main": "index.js",
  "homepage": "https://github.com/myogeshchavan97/github-repos-search",
  "repository": {
    "type": "git",
    "url": "git+https://github.com/myogeshchavan97/github-repos-search.git"
  },
  "dependencies": {
    "axios": "^0.20.0"
  },
  "devDependencies": {},
  "scripts": {
    "test": "echo \"Error: no test specified\" && exit 1"
  },
  "keywords": [
    "github",
    "repos",
    "repositories",
    "sort",
    "stars"
  ],
  "author": "Yogesh Chavan <myogeshchavan97@gmail.com>",
  "license": "ISC"
}
You have added homepage, repository, keywords and author for more information(These are optional). Make changes as per your GitHub repository.
Create a new GitHub repository from this URL and push the github-repos-search repository to GitHub. Navigate to https://www.npmjs.com/ and create a new account, If you don’t already have an account.
Open the terminal and from inside the github-repos-search folder, execute the following command:
npm login
and enter your npmjs website credentials to log in.

Now, to publish it to the npm repository run the following command:
npm publish
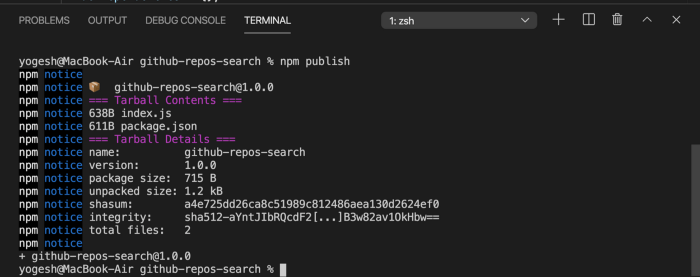
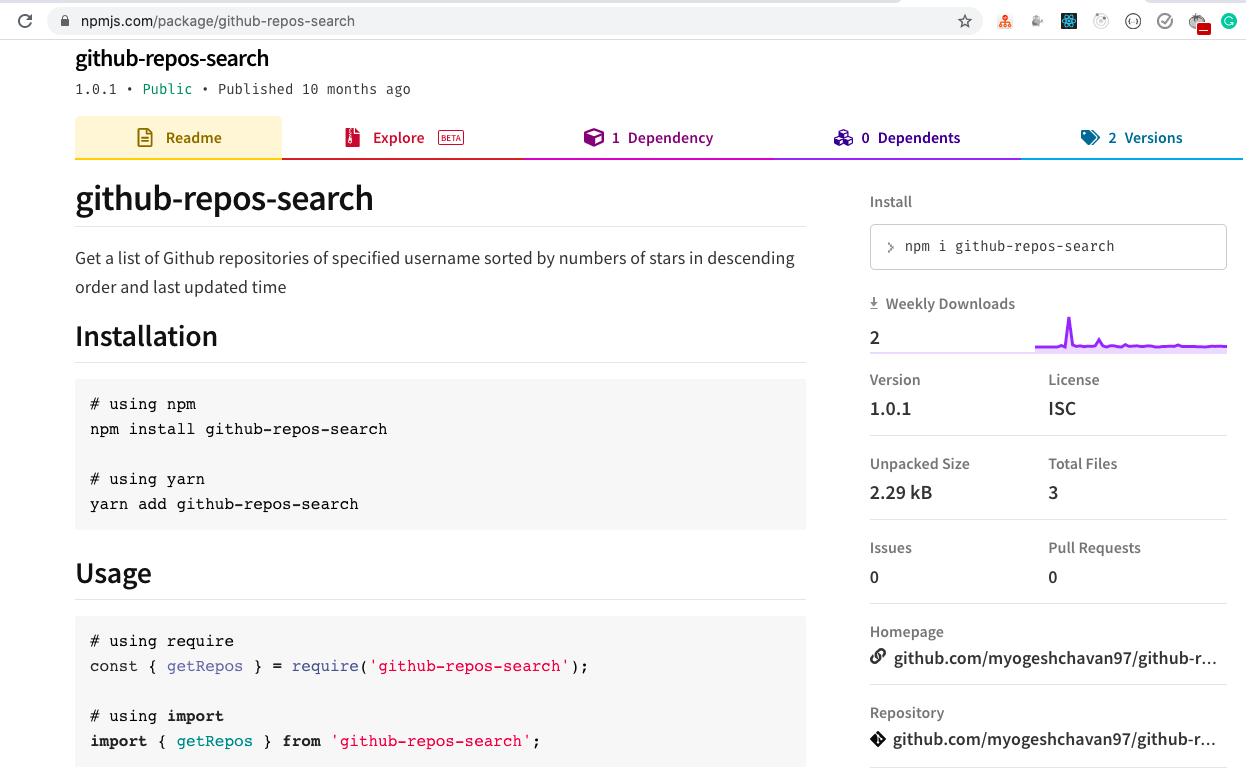
If you navigate to https://www.npmjs.com/package/github-repos-search in the browser, you will see your published package:
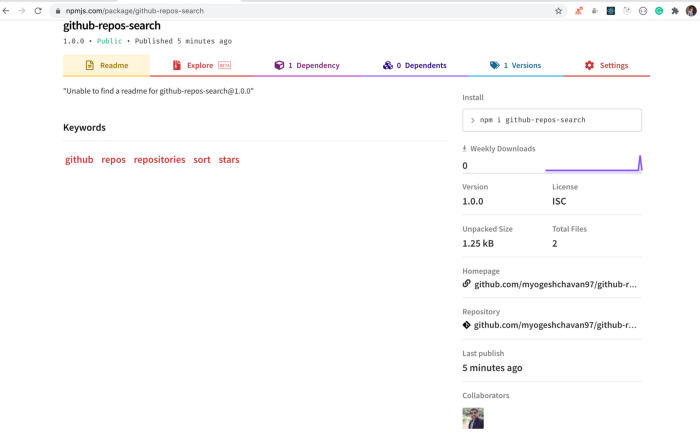
Now, let’s add a readme.md file for displaying some information regarding the package.
Create a new file with the name readme.md inside the github-repos-search folder with the contents from here.
Let’s try to publish it again using the npm publish command.
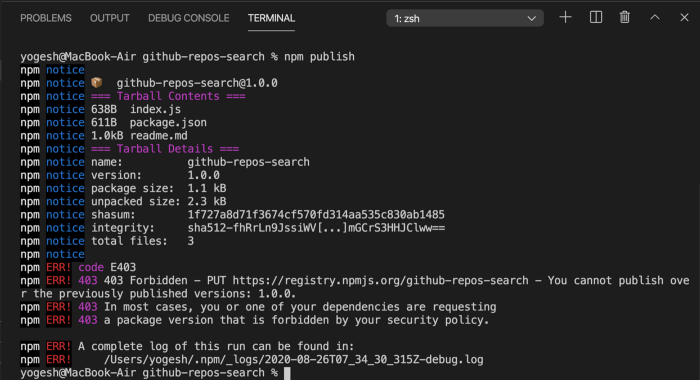
You will get the above error. This is because you are publishing the module with the same version again.
If you check our package.json file, you will see that the version mentioned in the file is 1.0.0.
You need to increment it every time publishing a new change. So what should you increment to? For that, you need to understand the semantic versioning concept.
Step 7 — Semantic versioning in npm
The version value is a combination of 3 digits separated by a dot operator. Let’s say the version is a.b.c.
The first value (a in a.b.c) specifies the major version of the package — Which means this version has Major code changes and it might contain breaking API changes.
The second value (b in a.b.c) specifies the minor version which contains minor changes but will not contain breaking API changes.
The third value (c in a.b.c) specifies the patch version which usually contains bug fixes.
In our case, you just added a readme.md file which is not an API change so you can increment the patch version which is the last digit by 1.
So change the version inside the package.json file from 1.0.0 to 1.0.1 and run the npm publish command again.
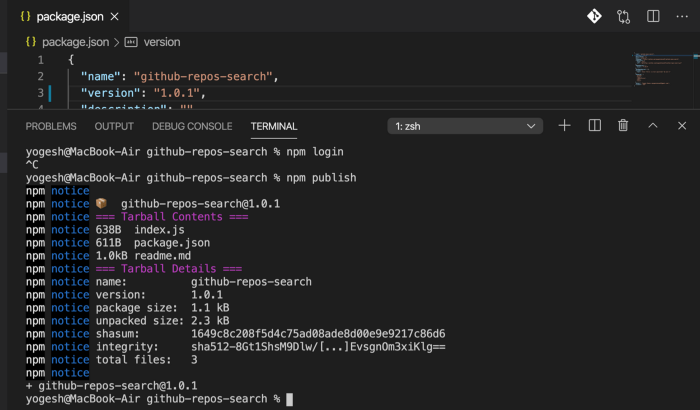
If you check the npm package now, you will see the updated npm package live here.
Conclusion
In this tutorial, you created an npm package and published it to the npm repository.
For the complete source code of this tutorial, check out the github-repos-search repository on GitHub. You can also see the published npm module here.
Thanks for reading!
Check out my recently published Mastering Redux course.
In this course, you will learn:
- Basic and advanced Redux
- How to manage the complex state of array and objects
- How to use multiple reducers to manage complex redux state
- How to debug Redux application
- How to use Redux in React using react-redux library to make your app reactive.
- How to use redux-thunk library to handle async API calls and much more
and then finally we'll build a complete food ordering app from scratch with stripe integration for accepting payments and deploy it to the production.

Want to stay up to date with regular content regarding JavaScript, React, Node.js? Follow me on LinkedIn.