How to Use React Portal to Create Custom Reusable Toast Component in React

Full Stack Developer | Freelancer | JavaScript | React | Nodejs.
Loves sharing knowledge through technical articles.
Dev.to: https://dev.to/myogeshchavan97
https://linktr.ee/myogeshchavan97
In this article, we will create a custom toast component from scratch using React Portal.
You can see the live demo of the final application here.
So let’s get started.
We will be using create-react-app to initialize the project.
Create a new project by running the following command:
npx create-react-app custom-toast
Once the project is created, delete all files from the src folder and create index.js, App.js, styles.css files inside the src folder. Also, create components and utils folder inside the src folder.
Now, open the src/index.js file and add the following contents inside it:
import React from 'react';
import ReactDOM from 'react-dom';
import App from './App';
import './styles.css';

ReactDOM.render(<App />, document.getElementById('root'));
Open the src/styles.css and add the following contents inside it:
.App {
  text-align: center;
}

a {
  text-decoration: none;
  background: #777;
  color: #fff;
  padding: 10px;
  border: 1px solid #000;
  border-radius: 2px;
  display: inline-block;
  margin-top: 200px;
  letter-spacing: 1px;
  font-size: 20px;
}

.toast {
  width: 100%;
  padding: 10px;
  position: absolute;
  background: #ccc;
  color: #666;
  font-size: 200%;
  text-align: center;
  left: 0;
  top: 0;
  right: 0;
  transform: translateY(-100px);
  animation: slideDown 3s;
}

@keyframes slideDown {
  0%,
  100% {
    -webkit-transform: translateY(-100px);
  }
  10%,
  90% {
    -webkit-transform: translateY(0px);
  }
}

.disabled {
  pointer-events: none;
  opacity: 0.3;
}

@media only screen and (max-width: 768px) {
  body {
    font-size: 13px;
  }

  a {
    font-size: inherit;
  }

  .toast {
    padding: 5px;
  }
}
We'll first add all the necessary contents inside the files and then we'll explore how the code works.
So, Inside the src/utils folder create a constants.js file with the following code:
export const TOAST_TIMEOUT = 3000;
This will indicate when to hide the toast message. In this case, the message will be hidden after 3000ms i.e 3 seconds.
Inside the src/components folder, create Toast.js file with following code:
import { useState, useEffect } from 'react';
import { TOAST_TIMEOUT } from '../utils/constants';
import ReactDOM from 'react-dom';

const Toast = props => {
  const [node] = useState(document.createElement('div'));

  const removeNode = () => {
    if (document.querySelector('#toast').children.length) {
      document.querySelector('#toast').childNodes[0].remove();
    }
  };

  useEffect(() => {
    if (props.show) {
      document
        .querySelector('#toast')
        .appendChild(node)
        .classList.add('toast');

      setTimeout(() => {
        removeNode();
        props.hideToast();
      }, TOAST_TIMEOUT);
    } else {
      removeNode();
    }

    return () => removeNode();
  }, [node, props]);

  return ReactDOM.createPortal(props.children, node);
};

export default Toast;
And now, Inside the src/App.js file add the following code:
import React, { useState } from 'react';
import Toast from './components/Toast';

const App = () => {
  const [show, setShow] = useState(false);

  const showToast = () => {
    setShow(true);
  };

  const hideToast = () => {
    setShow(false);
  };

  return (
    <div className="App">
      <Toast show={show} hideToast={hideToast}>
        This is some text
      </Toast>
      <a href="/#" onClick={showToast} className={`${show && 'disabled'}`}>
        Show Toast
      </a>
    </div>
  );
};

export default App;
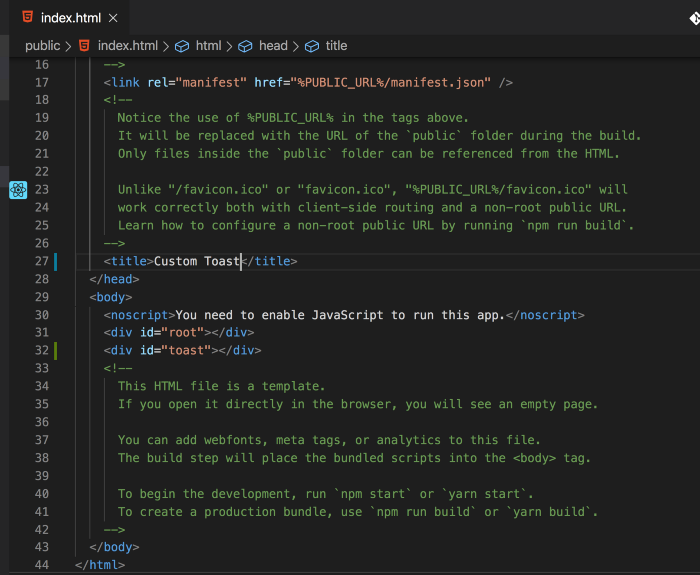
Now, open public/index.html and add
<div id="toast"></div>
after
<div id="root"></div>
Now, run the application by executing the yarn start command from the terminal/command prompt.
As you can see, when we click on the Show Toast button, the toast notification is shown for about 3 seconds and it's hidden again.
Also when the toast notification is shown, the Show Toast button disabled so the user will not be able to click the button again and it's enabled again when the toast notification is hidden.
Let’s understand the code from Toast.js which has the main logic for toast.
To display toast, we are using the
ReactDOM.createPortalmethod (added in React version 16) in the render method which allows us to display elements outside the root container which is helpful to display a modal or, in our case, a toast.We have added div with id toast inside
index.htmlalongside the div with idrootwhere we will be displaying the toast message.To use our Toast component we have used it like this inside the
App.jsfile:
<Toast show={show} hideToast={hideToast}>This is some text</Toast>
- When we add the text between the opening and closing tag of the component, the text will be available inside that component in
props.childrenorthis.props.childrenproperty which we are passing to thecreatePortalmethod inside theToast.jsfile:
ReactDOM.createPortal(props.children, node)
- We have initialized state with the HTML div element using
document.createElement('div')so we can later use it to add or remove from the toast div which is added inindex.htmlfile:
<div id="toast"></div>
Inside the
useEffecthook, we are adding the node to toast div fromindex.htmland adding the CSS for it so the CSS will not be applied by default but only when we want to display the toast message.We are passing an array
[node, props]as the second parameter to theuseEffecthook so the code insideuseEffectwill be executed only when node or props are changed which is similar to thecomponentDidUpdatelifecycle method.We have also added the
removeNodemethod which we call when the component is unmounted by returning a function from theuseEffecthook.We are using CSS animation for displaying the toast message and hiding it after 3 seconds as declared in CSS for the toast
animation: slideDown 3sWhen the toast is hidden, we are setting the show state flag to false so when we again click on the
Show Toastbutton, a toast message will be shown again.We are also disabling the
Show Toastbutton once we click on it so the user will not click it unnecessarily and we enable it once the toast is hidden.
Thanks for reading!
You can find the complete source code for this application in this repository and live demo here
Check out my recently published Mastering Redux course.
In this course, you will learn:
- Basic and advanced Redux
- How to manage the complex state of array and objects
- How to use multiple reducers to manage complex redux state
- How to debug Redux application
- How to use Redux in React using react-redux library to make your app reactive.
- How to use redux-thunk library to handle async API calls and much more
and then finally we'll build a complete food ordering app from scratch with stripe integration for accepting payments and deploy it to the production.

Want to stay up to date with regular content regarding JavaScript, React, Node.js? Follow me on LinkedIn.