Speed Up Your Coding in React By Making These Changes in Visual Studio Code

Full Stack Developer | Freelancer | JavaScript | React | Nodejs.
Loves sharing knowledge through technical articles.
Dev.to: https://dev.to/myogeshchavan97
https://linktr.ee/myogeshchavan97
In this article, we will see some of the settings you can do in Visual studio code to improve your productivity a lot when working with React.
So let's get started.
Enable emmet for React
If you are HTML/CSS developer, then you might already be aware of the emmet plugin. It provides autocompletion for HTML and CSS code by reducing the need for extra typing.
It's already included for all HTML and CSS files by default in VS code but we need to do some extra configuration to enable it for React.
Steps to enable:
- In Visual Studio Code, press
Control + Shift + PorCommand + Shift + P (Mac)to open command palette and typesettingand then selectPreferences: Open User Settingsoption

Search for emmet in the search box as shown in the below screenshot
On the left side, expand the extension menu and click on
emmetThen click on the
Add Itembutton underEmmet: Include LanguagessectionAnd then enter
javascriptunder theItemtextbox and enterjavascriptreactunder theValuetextbox.

- You're done.
Now open any component file from React application and type .container and press the tab key and it will autocomplete it to
<div className="container"></div>
This little configuration will save you a lot of time by removing the need of typing className every time to add a new class in React.
or type ul.list>li*3>a and press the tab key to convert it to
<ul className="list">
  <li><a href=""></a></li>
  <li><a href=""></a></li>
  <li><a href=""></a></li>
</ul>

You can learn more Emmet shortcuts here.
Extra Tips:
If you have created a new
.htmlfile then instead of typing thedoctype,head,metaandbodytags yourself, just type exclamation mark (!) and press tab and emmet will add the default HTML codeIf you want to generate some random lorem ipsum text then just type
p*4>loremand press tab and emmet will add 4 paragraphs with some random lorem ipsum textTo add multiple classes like
listanditemto the same element, type.list.itemand press tab which will be converted to
<div className="list item"></div>
If you are in a CSS file, to add any property you can use shorthand syntax. for example, to add letter-spacing of 10px just type ls10 and press tab and it will be converted to letter-spacing: 10px
Check out my this article to learn more about other useful Emmet shortcuts.
Automatically format code on file save
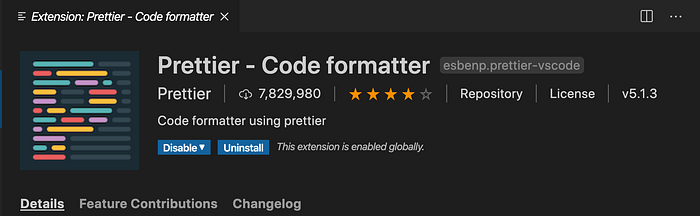
Install the Prettier extension for VS Code which formats code written in Javascript, Angular, Vue, React, Typescript and many other languages.
Installation:
- Click on the extension's icon in VS Code
- Search for
"prettier" - You will see the extension from Prettier
- Click on the install button
- Hit the Reload button or restart the VS Code, once the extension is installed
Usage:
- To automatically format the file on saving, In Visual Studio Code, press
Control + Shift + PorCommand + Shift + P (Mac)to open the command palette and typesettingand then selectPreferences: Open User Settingsoption - Search for
format on savesetting and check the checkbox.

That’s it! Congratulation! You have configured prettier to format as per the default settings.
Now, open any React code. Let’s say your code looks like this:

If you save the file using Ctrl + s or (Command + s for Mac), the prettier will format your code as shown below

This is much nicer and as per the React style guidelines.
If you have code like this:

Then on saving, it will be formatted like this:

So now, you don’t have to worry about adding or removing space or moving code to the second line if it does not fit on one line. Prettier does that job for you.
Now, write the code any way you want and just save the file to format it.
This will make you more productive as you will not be wasting your time in formatting code.
But sometimes, it may happen that, you don't want the formatting done by prettier and you want to keep your own formatting for a particular file, then you can follow the following step:
- In Visual Studio Code, press
Control + Shift + PorCommand + Shift + P (Mac)to open command palette and typesaveand then select"Save without Formatting"option

Advanced Configurations
If you want more control over the formatting, prettier also allows that.
Create a file with the name .prettierrc (dot prettierrc) in the root of your project and add the configuration as required
For example, add the following JSON in the .prettierrc file
{
 "singleQuote": true,
 "trailingComma": "none"
}
SingleQuote: true will use single quotes instead of double quotes for strings in your code
trailingComma: "none" will remove all trailing commas from object declaration in your file
You can find all the configuration options HERE.
Automatically add a semicolon at the end of the line
By default prettier does not add the semicolon after each line as it's optional.
So If you want a semicolon, you can use one of the the following two options:
- Add the following code in your .prettierrc file
{
  "semi": true
}
- In Visual Studio Code, press
Control + Shift + PorCommand + Shift + P (Mac)to open command palette and typesettingand then select"Preferences: Open User Settings"option and search forprettier semicolonand check the checkbox


As can be seen above, after we enable to option to add a semicolon, when we save the file using Ctrl + s or (Command + s for Mac), a semicolon will be automatically added to every statement.
I find the second option more feasible as you need to do this only once and not for every new project.
Install React snippets extension
Install the ES7 React/Redux/GraphQL/React-Native snippets extension for VS Code

This extension allows us to quickly add the snippets to our code when working with React.
You just need to type initial characters in the file and press enter to complete that snippet.
Following are some of the most widely used prefixes which allow us to add the snippet:
- imr : import React from 'react'
- imrd: import ReactDOM from 'react-dom'
- imrc: import React, { Component } from 'react'
- rcc: add react class-based component code
- rfc: add react functional component code
- est: add state to the component
- sst: add this.setState call
- cdm: adds componentDidMount lifecycle method
- cdu: adds componentDidUpdate lifecycle method

Some more prefixes:
- rafce: adds a functional component with the export statement (This is one of my favourites)
- rce: add react class-based component with the export statement
- impt: add prop types import
- clg: add console.log statement

There are a lot of prefixes which are very handy which you can find HERE
Thanks for reading!
Want to learn all ES6+ features in detail including let and const, promises, various promise methods, array and object destructuring, arrow functions, async/await, import and export and a whole lot more from scratch?
Check out my Mastering Modern JavaScript book. This book covers all the pre-requisites for learning React and helps you to become better at JavaScript and React.
Check out free preview contents of the book here.
Also, you can check out my free Introduction to React Router course to learn React Router from scratch.
Want to stay up to date with regular content regarding JavaScript, React, Node.js? Follow me on LinkedIn.